September 24, 2011

DIY Home Improvement

In early August, the Hubs discovered that we had a leak in our basement an hour before we were supposed to leave to go meet our extended family for a camping weekend.  The leak was not in the water supply pipes, but in the waste line coming from our kitchen.

As I have stated before, this is the house I grew up in and just about every system in the house has at one time been "improved" or "renovated" by my parents.  However much of those "improvements" were made 25-30 years ago.  Therefore we are bound to find many things that need repair as we settle into this house.  We have been in the house almost a year and a half, and since repairing the furnace last Winter, this is the first emergency - needs to be fixed right now - issue and so I should be grateful.

Since we were leaving for the weekend to go camping, we could have just left it until we returned, but who wants to deal with plumbing after camping all weekend?  I asked if we should call a plumber.  The Hubs gave me a pretty emphatic, "No".  So he took a couple photos of the section needing repaired and headed to our neighborhood hardware store.  Here is the leaking pipe:

Before
You can see clearly the strip of galvanized pipe that is missing above.  There were actually two sections of galvanized pipe and they both looked like that. This section of pipe is located right at the intersection of the 4" main sewer line coming from the main floor bathroom. The section at the bottom of the photo contains a clean out for that intersection. It was complicated. I am an architect, not a plumber. I have learned a lot about all building systems over the last 20+ years of architecture school and working, and I can swing a hammer, but plumbing is not something I ever thought I could take on.

But the Hubs felt he could fix it, so I stepped back and let him.

He returned with a sack full of black plastic pipe sections, including a new clean out section, some plastic pipe adhesive and teflon tape. Basically, we replaced this entire section, so as to remove all the sections of galvanized pipe that had obviously outlived their useful life. There were a couple measurements to be made and a couple cuts to some plastic pipe lengths to match the old sections. Measuring is my job in our marriage.  But that is pretty much all I contributed to this DIY plumbing repair. Well, that and running the kitchen sink a couple times on accident while he was working.  oops.  

He was not happy.

VERY not happy.  Because as I said, it happened twice. double oops.

But after cleaning that mess up (while I tried not to laugh and the Hubs tried -and succeeded- to keep his temper) we proceeded to put it all together.  The plumbing adhesive works FAST.  Remember that if you ever take this on for yourself one day. 

After
Ta da!  The Hubs will from here on out be known as Super Hubs.  And we were not late to meet the family for camping, this only took a couple hours beginning to end!

September 21, 2011

Chicken-Keeping Top Ten

As if this video alone is not reason enough for you to go out and get 3 or 4 baby chicks of your own, here are my top ten:

10.  More chotskies - People now have a new kind of gift they can give you - anything with chickens.  Great for white elephant parties!
9.  Weed eaters - My girls are really good at eating and scratching up all the young new weeds in my beds.
8.  Free poop - Chicken poop is amazing fertilizer, I only end up buying extra compost when I am making new garden beds.
7.  Compost helpers - the girls will eat most all of our veggie kitchen waste (if it is too far gone, it goes straight to the composter)
6.  Kids love them - My teenagers loved them as chicks....now not so much.  But they still enjoy some cred here in  Portlandia, where having chickens is cool with their peeps (no pun intended......ok maybe).
5.  Enhanced food security - You know where those eggs came from and your chickens are loved.
4.  Free pest control - They eat so many insects and they are quite good at it.  We have not had any large infestation issues since they moved in.
3.  Easy pets - They really do not require a lot of time (you do not have to walk them) and you can leave them in a secure coop for a couple days on their own.
2.  Chicken TV - Chickens are hilarious to watch. Little velociraptors in action.


and the number one reason to keep chickens is.......


1.  Eggs! - They plop out eggs every day. Yummy, tasty, healthy little omelets and scrambles waiting to happen.

Chicken Pile

September 18, 2011

The Importance of Saving Seed

Whereas a growing number of people are becoming interested in where their food comes from and how it is grown, this is not the case for most of the well-fed world.  Many people are too busy with work and family demands and don't have enough time or financial resources to know what is in that box of processed "convenience" food on the supermarket shelf.  But the frightening issue is that even that food source is not secure or necessarily safe.  Fruit and vegetable varieties are becoming extinct at an alarming rate. There was a great article in the July issue of National Geographic about the current state of our food system.

Less variety in our food crops means it hurts that much more if a virulent disease or insect decimates crops the world over. As food production became industrialized and along with the loss of small family farms, food crop varieties were lost as seed companies narrowed down the varieties they offered to increase efficiency and profits.  This situation became worse as companies began to genetically modify their seed so that it could withstand their custom chemical herbicides and pesticides to again increase production on large industrialized farms.

As this particular topic will lead me deep into the myriad of issues in our current food system, I will just leave you with some links and return to the topic of this post:

  • For more information about international seed conglomerates and genetically modified food, see here.
  • For info on toxic chemicals in food, see here.
  • For top ten GM crops facts, see here.

From left:  Appaloosa dry bush beans, Purple podded pole beans,
Trofero filet bush beans and in front are  French Cranberry bush beans

Seed saving is one of the simplest ways that each one of us can help to slow this loss of valuable and important diversity in our food sources, and at the same time take control of our personal food system.  I collected the beans above from my garden a couple weeks ago.  I have amassed a large collection of seed over the last couple of years.  From my own garden, family, friends and during walks around the neighborhood....no one usually minds (or notices) if you pull a seed pod off as you walk by....

It is important to only save the seeds from the healthiest of plants, that produce the best quality vegetables, fruit or flowers.  That way the future plants have a higher chance of presenting with the qualities you desire.  Most seeds you can harvest after the seed pods have dried out (but before the first rain!).

Love in the Mist seed pod
Poppy seed pod
Some, like tomato's, you have to do a little extra work.  Take a nice tomato and break it apart and place it in a glass with some water, uncovered.  Leave it there for a few days until it starts to look like a science experiment and the gel like membrane around the seeds has dissolved.  Then rinse the seeds in a strainer and lay them out on a ceramic plate to dry.  When dry store in a dry cool place.

I have a nice area in my basement that my mother set up (when it was her house) with a potting station and a sink with running water.  I keep all my seeds here in little baby food or spice jars with labels of what they are and the year.

It is also important to note that when I purchase seed I almost always buy heirloom, self-pollinating varieties.  Heirloom plants have been grown for many years and in some cases handed down generation to generation and generally remain genetically intact. Hybrid seeds may not be stable and seeds that you save may not create the same plant the next year....they may revert back to the parent plant's characteristics, or the seeds may be sterile. This is one of the ways that large seed companies that supply industrial farms ensure that farmers come back year after year to buy more seed.

I personally sleep a little better at night knowing that somewhere in the Arctic there is a place that is storing the genetic diversity of our global food crops. The Svalbard Global Seed Vault  stores duplicate seeds from seed collections around the world. In addition, the Seed Savers Exchange is a non-profit organization dedicated to sharing and saving heirloom seeds.

If you live in the Portland metro area, I just learned that Portland Homestead Supply is starting a seed exchange at their store location in Sellwood.

Note: I just found out about a local seed saving organization, SE Portland Seed Bank.  They look to be a great local resource for finding other urban farmers in your neighborhood, learning about seed saving, and connecting with other seed exchange parties and events!

September 14, 2011

September Bounty

I came home from work today and immediately went out back to collect what I thought would be a few more tomato's.  This is what I found:


A bit more than a few tomato's.

Yellow Patty Pan Squash
Raspberries, second round this summer!
Lots of toms - Cherokee Purple, Oregon Spring, Caspian Pink, Brandywine, Flame, Amish Paste, Sweet Baby Girl, Yellow Pear
Purple Podded Pole Beans
Trofero Filet Bush Beans
French Cranberry Bush Beans
Zucchini (on the left...a little out of hand in size)
CUCUMBER on the right side....way out of hand in size

For your enjoyment, the girls and I had a little photoshoot last weekend:
Pepper in mid speech about how unbelievably hot it was.  She says this is not her good side.
Red staring me down and looking quite prehistoric.  Don't tell her I said that.
I took these with the app More Lomo for the iPhone.  There are quite a few amazing and FREE photo apps available.  I am actually enjoying taking photos with my iPhone more than my DSLR because of all the fun apps.  Any of you have a favorite?

September 12, 2011

Honey Extraction and Zenger Farm

The Harvest Fest was Saturday at Zenger Farm.  The hubs and I (and Neverella) volunteered to help out the Zenger Farm Community Bee Project for a couple hours.  This was the first time I had actually been out to the farm site, it is within the city of Portland and only a few minutes drive from our house.

View of part of the farm, notice the houses beyond in the trees.
The farm sits on SE Foster Road near the Franz Bakery outlet, neighboring homes and along the Springwater Corridor, a pedestrian and bike trail that links to the city center.  The farm has chickens, turkeys, a few acres of farmland, greenhouses and of course some beehives.

Zenger chickens and sunflowers
We had the pleasure of helping out the bee group with honey extraction.  The group has a honey extractor that they allowed the public to use during the Harvest Fest for a small donation to the farm.  One of the bee group members brought in two supers full of capped comb.

Super full of capped comb
We learned that you don't have to have any special tools in order to slice the top off of the capped comb.  We used a fork!  We just scraped the fork across the capped comb until all the cells were open, then flipped over the frame and did the same to the other side.

Frame full of capped honeycomb
Frame of uncapped honey
Frame ready for the extractor
The frames were then placed into the extractor, in this case a manual crank extractor similar to this one.  Apparently, once the frames have been through the extractor you can set them out near your bees and they will finish cleaning the remaining honey out of all the comb.  Then you can save the comb/frame to be re-used next season.  We learned that it takes a lot more pollen to create the wax for comb than it does to produce honey.  So if you can save their hard work for next year, they can spend more time creating honey and less time building comb.

We also walked around the farm on a self-guided tour, checked out the farmstand where Zenger was selling their produce and honey, a few other vendors including Livingscape Nursery, and some volunteers at booths answering visitors questions about keeping chickens, bees and composting.  It was a nice day at the farm, and we learned a good deal more about beekeeping.  We will be ready next Spring for our own hive!


September 10, 2011

September Garden

The garden is starting to show the signs of autumn.  The tomato and squash plants are starting to brown in spots...I am just hoping more will ripen before the cool weather comes back to us.  We are in our 4th or 5th week of 75+ deg weather, finally!


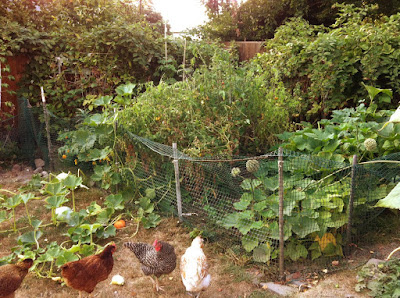
Those are the volunteer squash that I unwound from the tomato's and strung out into the yard.  The chickens seem to mostly ignore the squash for now.  They are in some of these shots because they think that every time they see me I might just give them a treat.  Aaaand...I usually do.  They got a few yellow pear tomato's, a half eaten raspberry and few of the last blueberries today.  You can see a little orange pumpkin up close and a couple winter squash farther away.


Then here is another angle of the garden and you can see the coop in the background.  Those are marigolds growing in the front from seeds my Aunt gave me.  I sprinkled those seeds all over the place when I planted my starts, and there are little clumps growing all around the tomato's, it is very pretty.  I plan to add more flowers and herbs to the garden next year.


That is an artichoke growing there as well, but so far it has not produced any flower heads.  The raspberries are just starting to put on their second round of berries.  I will have to start another jug of country wine!

September 8, 2011

Chicken Problems

So I originally started this post a couple months ago when I found the weirdest thing ever in the nest box one morning, but have put off posting....because it is kind of gross.  If you are sensitive to discussions of bodily fluid and/or bodily functions (CA/TA, you know who are) you may want to skip reading this post.

You have been warned.

One morning in July, I opened the nest box to scoop out their droppings from the night before and I found this weird kind of fleshy mass in one of the piles of droppings under the roost.  Of course, I could not just toss it out with the rest into my bin, I had to take it inside and DISSECT it.

Of course.

I have had chickens for over two years and had never seen this before, nor have I heard it mentioned on the various forums and blogs I read. What does this mean?  All four girls seemed happy and eating and running around like healthy chickens.  It did occur to me however, one of my chickens has not been laying regularly for a couple of months and that these two incidents might be related. The Rhode Island Red, whom we creatively named, Red.  But she has not appeared egg-bound, nor has she been waddling or showing any signs of internal laying that I could tell.  To this point, I had attributed it to age.

My hubs walked into the kitchen as I had a kitchen knife in one hand, looked at my plate full of fleshy mass and asked what the heck I was doing, and then promptly left again, mumbling something about not wanting to know.

So I dissected the mass and took photos before and after and posted them to the Yahoo group PDXBackyardChix.  For those of you that love watching ER or Real Surgery or are dying of curiosity you can see photos here, but again, I warn, they are graphically gross to the max.  Here is another link to a thread where people are talking about similar things, I was referred to this by someone on the yahoo group.  If you are living in the Portland metro area (or not, there are a number of members from across the US) this yahoo group is a great resource.  There are quite a few old hats that regularly check the boards to answer newbie questions and concerns.  I have personally learned a lot from this group.

Back to the mass.  It seems that this is likely the result of a chicken that is internally laying.  Apparently when something is inside the hen and begins to get infected the chicken's body envelops it in flesh like material to isolate it.  Hence the weird mass.  These masses have been found in chickens that died for no outwardly apparent reason....and they have been found in nest boxes of internal layers that go on with their chicken lives no problem.  So what I take from this is that Red may live to tomorrow or she may flop over and be gone tonight, we will never know until it actually happens. She does occasionally lay an egg, maybe every 3-4 weeks or so, that are seemingly normal and she runs around foraging in our yard along with everyone else, quite happy.  I think she may be older than I was told when I picked her up from her former owner in December of 2009, and that she is likely 3 or 4 years old now and her egg laying days are behind her.  The rest of my girls are just over 2 years old.  I think.  I got Smores from the same flock as Red, so she may be a wildcard as well.

Red doing her chicken thing.
Needless to say, my egg production is down for my four hens...and we are really starting to feel it.   We definitely plan to finish extending the hen house part of our coop this fall before the weather turns too cold to be outside with a hammer and nails.  We need to get another 4-5 chicks when the farm stores start getting them in again in February or March.  Then the new chicks will hopefully start laying at the end of summer and supplement our egg supply.  My girls have definitely slowed down with the shorter days and it has been difficult to keep ourselves (and my sister's family and my parents) in eggs.


September 7, 2011

More on Dog Island Farm

Last Spring the folks at Dog Island Farm spent some time with Whole Foods making a film about their urban farm and their "Year without Groceries".  I really admire everything that Rachel and her family do on their urban farm, and the all the efforts they go through to bring the knowledge and skills they have gained to the community around them.

Check it out:

September 6, 2011

Roasted Heirloom Tomato's - Jars of Joy

A few years ago, I stumbled across a recipe for roasted heirloom tomato's.  The source of the exact recipe I cannot remember.  However, this recipe is what led me to the way we preserve most of our tomato harvest each summer, and I am going to share it here with you.

You begin by cutting your tomato's into thick slices and place them in one layer on roasting pans, or cookies sheets with sides that you have already seasoned with olive oil.  The recipe initially suggested that you line the pans with aluminum foil, but I find this an unnecessary step, as the pans are fairly easy to clean..and a waste of foil.

Pre-heat your oven to 225 degrees and roast the tomato's for 2-4 hours (depending on how thickly you sliced them) until they begin to reduce in size.  You can leave them in longer if you want them to become more like sun-dried tomato's.  This process was traditionally done by laying them in the sun...but the oven works just as well and I do not have to worry about keeping bugs and animals out of them.  Add whole garlic cloves, oregano, thyme, and salt to your taste.  The garlic will roast along with the tomato's.  I used fresh thyme and oregano from my herb garden and the last of my garlic from last year.

Various heirloom tomato's, garlic, thyme and oregano, ready to go in the oven.
I roasted this pan for almost three hours, and I should have taken an "after" photo, sorry.  Since tomato's are acidic, you can process them in a water bath canner.  Get your jars and lids ready and heat the water in your water bath canner while they are roasting.

When they are roasted, simply scoop them out and into your clean jars.  I layer them with fresh basil and top them off with a tablespoon of lemon juice and a little more olive oil. Clean the rims, add your new seals and screw the rings on tightly.  I boil in a water bath process for 45 minutes.  Refer to The National Center for Home Canning for the basics of all canning methods.  There is a great tutorial on Chickens In the Road. Another worthwhile blog is Food In Jars.  She is a wealth of information on all things canning, and on her blog she talks about Weck all-glass jars and Tattler Re-Usable lids...both of which I am going to look into further.  It really bothers me that the Ball/Kerr lids can only be used once and then must be tossed.

Jars of Joy
The jar on the right could have used another tomato or two, but alas, this was all I was able to harvest. Two measly quarts!  I really hope we continue this warm weather so the rest of them have a chance to ripen.  We call these "Jars of Joy" in our house, as they give us immeasurable pleasure to open them in the dead of Winter....or late cold Spring as the case may be here in the Pacific Northwest.


September 4, 2011

September Events

Here are a few events happening locally that you may be interested in attending:

September 6th 13th, 6pm InFarmation and Beer! Meetings are the first second Tuesday of each month at Holocene.  Get the deets here.  This event is sponsored by Friends of Family Farmers, they have different speakers and topics each month. Sorry, I confused the date of their monthly meetings, they meet the SECOND Tuesday of every month!

September 6th, 6-8pm  Seed Saving Workshop sponsored by Growing Gardens.  Learn to save seeds, gather and swap seeds at a local permaculture urban farm.  Get more details here.

September 10th, 1-7pm Zenger Farm Harvest Fest.  Celebrate urban farming and the harvest season with farm tours and activities for the whole family. More info.  The hubs and I will be volunteering to help out with this event with the Zenger Farm Community Beekeepers.

September 9th - 11th, Muddy Boot Festival.  "A soulful celebration of sustainable living" in SE Portland.  More information is here.

September 18th, Water Bath Canning Class with Lost Arts Kitchen.  Get the info here.

September 30th - October 1st, H.P. Lovecraft Film Festival at the Hollywood Theatre.  Ok, so this is not really related to my blog....but this is one of the coolest things that happens here in Portland.  You need to check it out.

My Mexican Sunflower finally blooming


September 3, 2011

Toms at Long Last


So it seems we will be getting some sort of tomato harvest here after all.  It is September and this is my first bounty....other than the small bowl of cherry tomato's we made into bruschetta for our BBQ last weekend.  I think this load may make at least two quarts.  In past years I have ended up with at least 20 quarts or so, but I am afraid this is going to be a slim harvest....AND I planted 12 plants this year!

In this harvest:
Sweet Baby Girl
Yellow Pear
Oregon Spring
Flame
Cherokee Purple

The yellow pear, flame and cherokee purple are all from seed I have saved from past harvests, I have been growing them all for a few years now.


September 2, 2011

All Natural Lip Balm

It seems that my posts on natural home cleaning and the shampoo experiment are a popular topic, so I will expand on the idea.  We have been making our own lip balm, lotion, deoderant, shaving cream (hubs) for almost a year now and I do not plan to buy something ever again that takes me only minutes and pennies to make myself.  AND, I know exactly what is in it and it is all natural.

Making your own lip balm is the easiest one!  My daughters love making their own, and also making it as gifts for their friends.

All you need is some olive oil or another oil base and some beeswax. I typically use sunflower or sesame oil.  Sesame oil has the added benefit of natural UV block.  I usually add a couple drops of an essential oil for scent.  My favorites are basil and lemon.  You can also add extracts with flavor or honey if you prefer.


To make Basic Lip Balm:
1 Tbsp. beeswax (either grade it from a block or buy it in pellet form)
1 Tbsp. sunflower oil

Melt the beeswax and sunflower oil in a microwave safe glass for 1 minute, or until melted.
Add one to three drops essential oils.
Pour into the container of your choice.  Let site overnight until completely solid. This amount fills a lip balm tube nicely.


The recipe above makes a nice lip balm that melts with your body heat easily, but if you want something a bit more malleable that coats your lips you can add a teaspoon or so of shea butter.  I usually add a couple drops of honey for that hint of sweetness.  I will then add a drop of vitamin E, as a natural preservative.

The best part about this is that the tube of lip balm you just made cost about .25 cents.  If you purchased new lip balm tube it cost you .50 cents.  To buy all natural lip balm in the store--- $3 - $7 per tube!

I get most all my supplies through Mountain Rose Herbs.  I have purchased some containers through their site as well, but I prefer to collect empty containers from my family and friends, clean them out really well and re-use them.  A little soap and hot water will clean out an old lip balm tube easily enough, and most labels come off fairly easily.  I actually obtained my beeswax from a local beekeeper at a farmer's market.  I have found that some oils, aloe etc. are less expensive if you buy them through Azure Standard.  I order through a buyer's group in North Portland.


Yes, my label construction needs some help.  I plan to purchase a circle punch as soon as I can drag myself to the craft store.  I made lotion and lip balm as holiday gifts last year, everyone loved them.  Now take 3 minutes and make some lip balm for yourself!